Reducer fabrication layout marking with drawing | Development of bottom cone
Hopper bottom cone fabrication layout
How to draw layout reducer
Reducer fabrication layout marking step by step
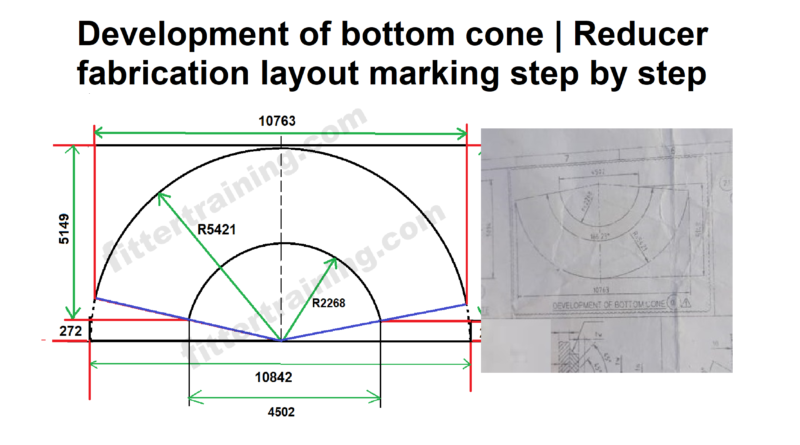
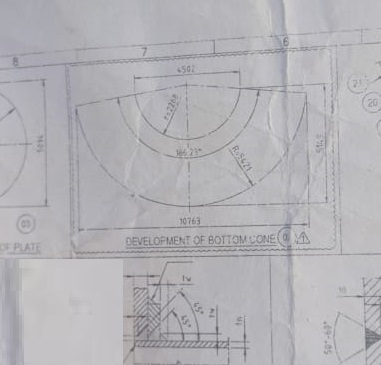
Development of bottom cone
Reducer fabrication layout marking with drawing
अगर इस तरह से आपको ड्राइंग मिला है कोन बनाने के लिए तो कैसे मार्किंग करेंगे
यह स्टेप बाय स्टेप बताया गया है
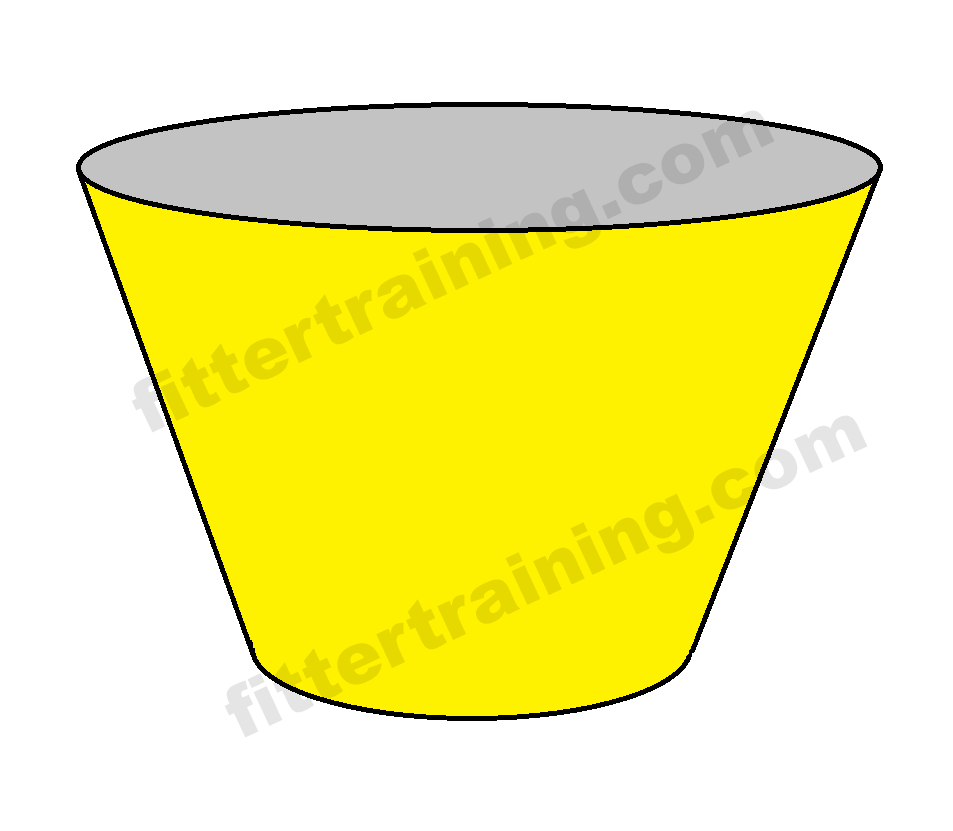
यह एक होपर का नीचे का कोन है जिसे आप रिड्यूसर भी कह सकते हैं
और यह कंसंट्रिक्स रिड्यूसर है
ड्राइंग में देख सकते हैं लेआउट दिया गया है और उसमें पूरा डाइमेंशन दिया गया है किस तरह मार्किंग करना है
जितना डाइमेंशन ड्राइंग में दिया गया है सेम वैसा ही चित्र नीचे बनाया गया है और से वही डाइमेंशन लिखा गया है
यह रिड्यूसर का लेआउट में जो डिग्री है 166.23° degree
If you have got a drawing like this to make a cone, then how will you do the marking
This is explained step by step
This is the bottom cone of a hopper which you can also call a reducer
And this is a concentric reducer
You can see in the drawing that the layout is given and the complete dimensions are given in it, how to do the marking
The same picture has been made below as the dimensions given in the drawing and the same dimensions have been written
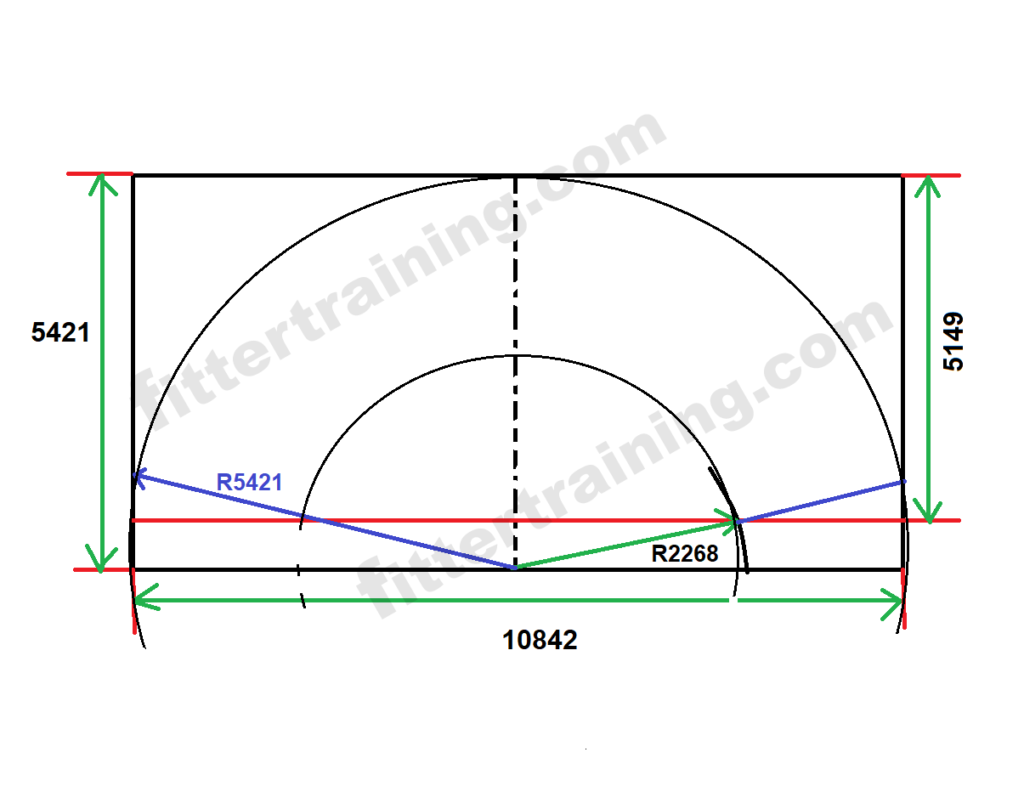
The degree of this reducer in the layout is 166.23° degree
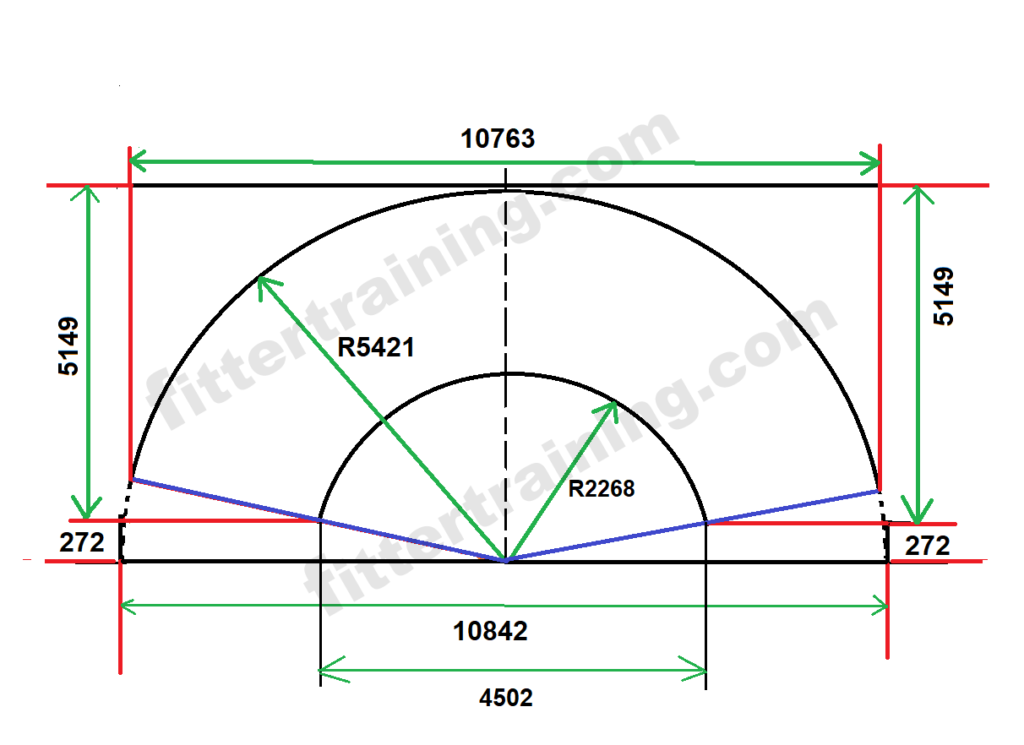
R5421 – 5149 = 272 mm

सबसे पहले इस तरह एक स्क्वायर मार्किंग करें
बड़ा रेडियस डाइमेंशन
Larger radius dimension 5421
5421 × 2 = 10842 mm
5421 × 10842 square marking
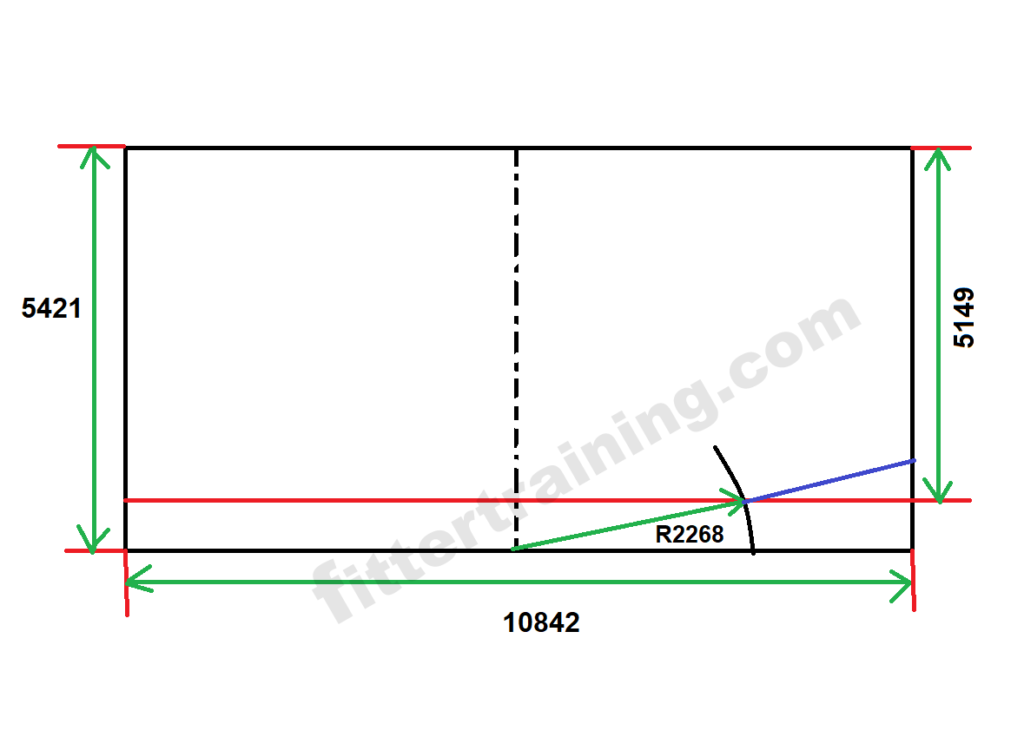
स्क्वायर मार्किंग के सेंटर में एक वर्टिकल सेंटर लाइन मार्किंग करें
ड्राइंग में देख सकते हैं रिड्यूसर लेआउट का एक हाइट डाइमेंशन दिया गया है 5149
ऊपर से नीचे की तरफएक होरिजेंटल सेंटर लाइन मार्किंग करें उतने दूरी पर जितना डाइमेंशन दिया गया है 5149
उसके बाद स्मॉल रेडियस डाइमेंशन मार्किंग करें और उसी सेंटर लाइन पर मिलाये जो होरिजेंटल लाइन मार्किंग किया गया है
R2268 small radius dimensions
बीच पॉइंट से एक लाइन दोरी लगाकर वर्टिकल लाइन तक एक सीधा लाइन खींची डिग्री वाला
ऊपरवाला डिजाइन में देख सकते हैं किस तरीका से मार्किंग किया गया है
Mark a vertical center line in the center of the square marking
You can see in the drawing that a height dimension of the reducer layout is given as 5149
Mark a horizontal center line from top to bottom at the distance given as the dimension 5149
After that mark the small radius dimension and join it on the same center line where the horizontal line marking has been done
You can see in the above design how the marking has been done
दूसरी तरफ बड़ा रेडियस डाइमेंशन मार्किंग करें R5421
और दोनों राउंड मार्किंग करते जाएं
तो फ्रेंड इसी तरीके से आपको या लेआउट मार्किंग करना है
बीच में अगर आप सेंटर लाइन एक मार्किंग करते हैं तो आप इस तरह दो पार्ट में इसे बना सकते हैं
On the other side mark the bigger radius dimension R5421
And keep marking both the rounds
So friend this is how you have to do the layout marking
If you mark the center line in the middle then you can make it in two parts like this
उसके बाद आप इसे हाइड्रोलिक के जरिए या फिर रोलिंग मशीन के जरिए आप इसे बैंड करके इसको जॉइंट करके और प्रोड्यूसर बन सकते हैं
After that you can band and join it with the help of hydraulics or rolling machine and become a producer